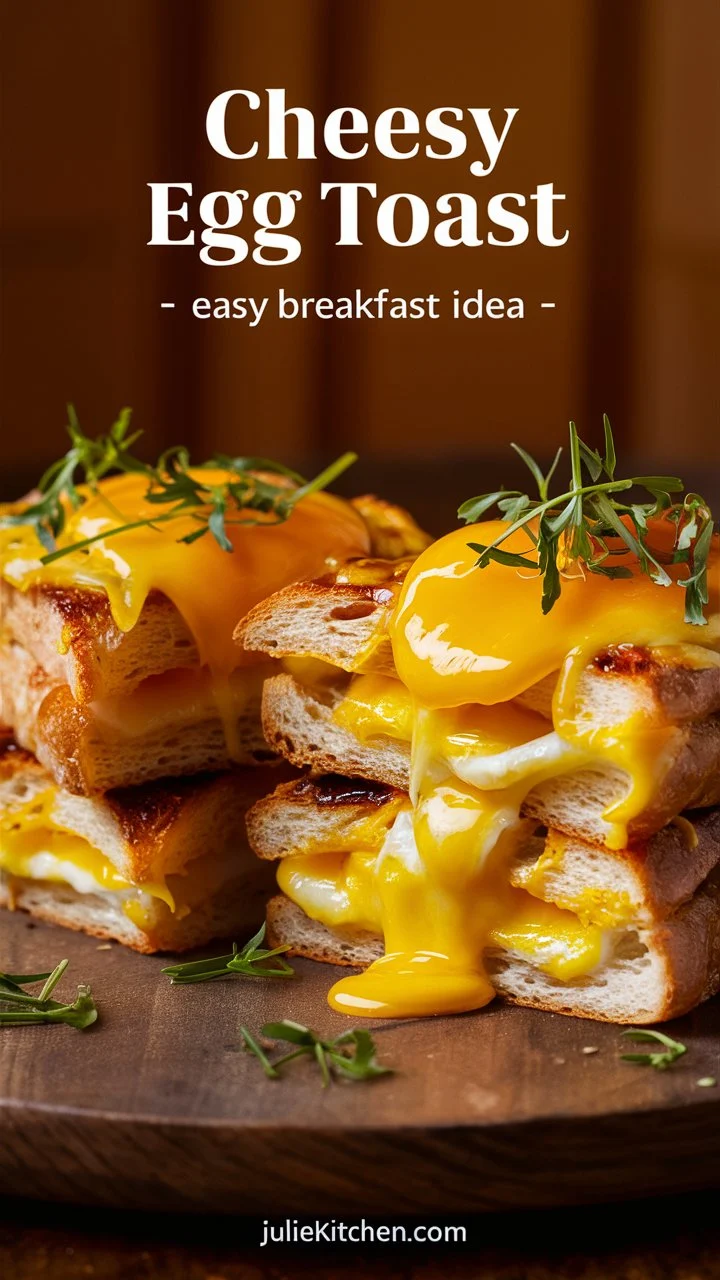
Imagine waking up to the smell of warm, buttery toast topped with a perfectly cooked egg, ready in just minutes. The crisp edges, soft center, and runny yolk create a breakfast that feels like a warm hug, even on the busiest mornings.
Whether it’s a lazy Sunday or a rushed weekday, this easy egg toast recipe will bring joy to your table without stress. It’s filling, healthy, and feels like something you would order at your favorite café—right at home.
Get ready to fall in love with your mornings again.
Why You’ll Love This Easy Egg Toast
✅ Quick and Easy: Ready in under 10 minutes. ✅ Nutritious: Full of protein and healthy fats to keep you energized. ✅ Customizable: Add cheese, avocado, or herbs for your favorite flavors. ✅ Kid-Friendly: A fun, easy breakfast even picky eaters will enjoy.
Ingredients You’ll Need
2 fresh eggs (or as many as you need)
2 slices of bread (whole grain, sourdough, or brioche)
1 tbsp butter (or olive oil)
Salt and pepper to taste
Optional: sliced avocado, cheese, herbs, chili flakes, or hot sauce
How to Make Easy Egg Toast
1️⃣ Warm the Pan
Heat a non-stick pan over medium heat and add butter until melted and bubbly.
2️⃣ Prep the Bread
Press the bread into the melted butter so it absorbs flavor.
3️⃣ Crack the Eggs
Carefully crack an egg on each slice of bread. Let it cook until the egg whites are set, but the yolk is still soft (about 3-4 minutes).
4️⃣ Season
Sprinkle salt, pepper, and optional chili flakes while cooking.
5️⃣ Serve Hot
Use a spatula to carefully transfer your egg toast to a plate. Top with avocado, herbs, or cheese if you like.
6️⃣ Enjoy!
Slice and let the yolk run for that perfect creamy bite.
Pro Tips for the Best Egg Toast
✅ Use fresh eggs for the best flavor and texture. ✅ For a runny yolk, cook on medium heat and keep an eye on it. ✅ Don’t skip seasoning; a pinch of salt brings out the flavors. ✅ Add toppings like sliced tomatoes, pesto, or spinach for variety. ✅ If serving multiple people, keep cooked toasts warm in the oven at 200°F (90°C).
Mistakes to Avoid
🚫 Using stale bread: It can become chewy. Use fresh, thick slices for best results. 🚫 Overcooking the egg: Watch the yolk closely for the perfect run. 🚫 Skipping toppings: Toppings add nutrition and excitement to your toast. 🚫 Cooking on high heat: This can burn the bread before the egg is cooked.
Serving Suggestions
✨ Avocado and Tomato Slices for a fresh, creamy bite. ✨ Hot Sauce or Sriracha for a spicy kick. ✨ Cheese and Herbs for extra flavor. ✨ Serve with fresh fruit or coffee for a complete breakfast.
FAQs about Egg Toast
Can I make egg toast in advance? It’s best fresh, but you can prepare toppings in advance to save time.
What bread is best for egg toast? Whole grain, sourdough, or brioche are great for flavor and structure.
Is egg toast healthy? Yes! It provides protein, healthy fats, and fiber, especially with whole-grain bread.
Can I add other toppings? Absolutely. Try spinach, feta, smoked salmon, or even sautéed mushrooms.
Conclusion: Make Mornings Special
This Easy Egg Toast is your new go-to for a quick, comforting breakfast that feels special without any hassle. With a few simple ingredients and endless topping options, you can enjoy café-style breakfast at home, making mornings something to look forward to.
💛 If you try this recipe, leave a comment below and let me know how it turned out!
✨ Pin this recipe to your Breakfast Board so you can find it easily whenever you need a cozy morning meal.
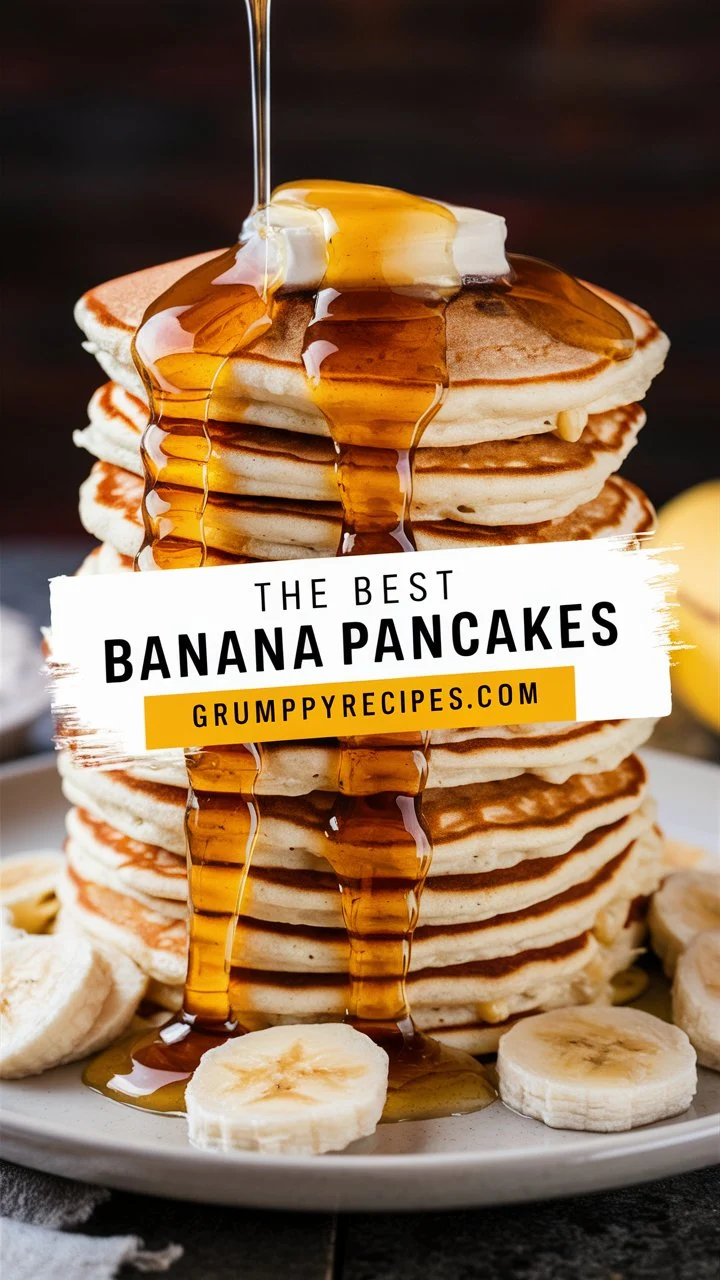
Have ripe bananas sitting on your counter? Turn them into the fluffiest, easiest banana pancakes you’ve ever had!
These pancakes are soft, warm, and naturally sweet, making them perfect for lazy Sundays, school mornings, or when you need a comforting breakfast without fuss. Every bite is packed with banana flavor, a hint of vanilla, and a golden crisp outside with a fluffy inside.
✨ Whether you top them with honey, berries, peanut butter, or a drizzle of maple syrup, these banana pancakes will become a family favorite you’ll crave again and again.
Why You’ll Love These Easy Banana Pancakes
✅ Quick to make: No fancy tools needed, ready in 15 minutes. ✅ Naturally sweet: Uses ripe bananas, so no extra sugar needed. ✅ Fluffy and soft: Perfect texture that melts in your mouth. ✅ Kid-approved: A fun breakfast for picky eaters. ✅ Budget-friendly: Uses ingredients you already have.
Ingredients You’ll Need
2 ripe bananas (brown spots = perfect sweetness)
1 cup all-purpose flour (or whole wheat for healthier pancakes)
1 tbsp baking powder (for fluffiness)
1/2 cup milk (regular or any non-dairy milk)
1 large egg (or flax egg for vegan)
1 tsp vanilla extract
Pinch of salt
Butter or oil for cooking
How to Make Easy Banana Pancakes
1️⃣ Mash Bananas
In a bowl, mash bananas with a fork until smooth.
2️⃣ Add Wet Ingredients
Add the egg, milk, and vanilla extract. Whisk until combined.
3️⃣ Mix Dry Ingredients
In another bowl, whisk flour, baking powder, and a pinch of salt.
4️⃣ Combine
Add dry ingredients to the banana mixture. Stir gently until just combined (a few lumps are okay for fluffiness).
5️⃣ Cook
Heat a non-stick skillet on medium heat. Grease lightly. Pour 1/4 cup batter for each pancake. Cook until bubbles appear on top (about 2 minutes), then flip and cook until golden brown.
6️⃣ Serve
Stack pancakes on a plate, top with maple syrup, sliced bananas, berries, nut butter, or whipped cream, and enjoy warm.
Tips for Perfect Banana Pancakes
✅ Use ripe bananas for the best sweetness and flavor. ✅ Do not overmix; a lumpy batter = fluffier pancakes. ✅ Cook on medium heat to avoid burning the outside while keeping the inside cooked. ✅ Let the batter rest 5 minutes before cooking for extra fluffiness.
Mistakes to Avoid
❌ Using overripe, mushy bananas (black and leaking) – they can make pancakes too wet. ❌ Overmixing – leads to tough pancakes. ❌ Cooking on high heat – pancakes will burn outside but remain raw inside. ❌ Skipping resting time – a short rest helps pancakes rise better.
How to Serve
✨ Drizzle with honey or maple syrup for a classic touch. ✨ Top with fresh berries, sliced bananas, or nuts for extra nutrition. ✨ Add a spoon of yogurt or whipped cream for creaminess. ✨ Pair with Cranberry Holiday Butter (check our recipe) for a festive twist.
Storing and Reheating
✅ Store leftover pancakes in an airtight container in the fridge for up to 3 days. ✅ Reheat in a toaster or microwave for a quick breakfast. ✅ Freeze pancakes with parchment between each layer, and reheat directly from frozen.
FAQs About Banana Pancakes
Can I make these pancakes gluten-free? Yes, use a 1:1 gluten-free flour blend.
Can I make the batter ahead of time? It’s best cooked fresh, but you can mix dry ingredients ahead and mash bananas separately to save time.
Can I add chocolate chips or nuts? Absolutely! Sprinkle them on the batter once poured on the skillet.
Final Thoughts
These Easy Banana Pancakes will quickly become a staple in your home. They’re cozy, comforting, and bring a smile to anyone who eats them, turning simple mornings into special moments.
If you loved this recipe, don’t forget to:
✅ Pin it for later on Pinterest. ✅ Share your pancake stack on Instagram and tag us! ✅ Join our newsletter for more easy, comforting recipes your family will love.
✨ Because every morning deserves a fluffy, warm start. ✨
If you would like, I can also prepare:
✅ A Pinterest Pin Title + Description + Hashtags for this recipe. ✅ An SEO meta description (under 155 characters). ✅ A social caption for Instagram or Facebook.
to help you post efficiently and grow your site followers. Let me know whenever ready!Tools
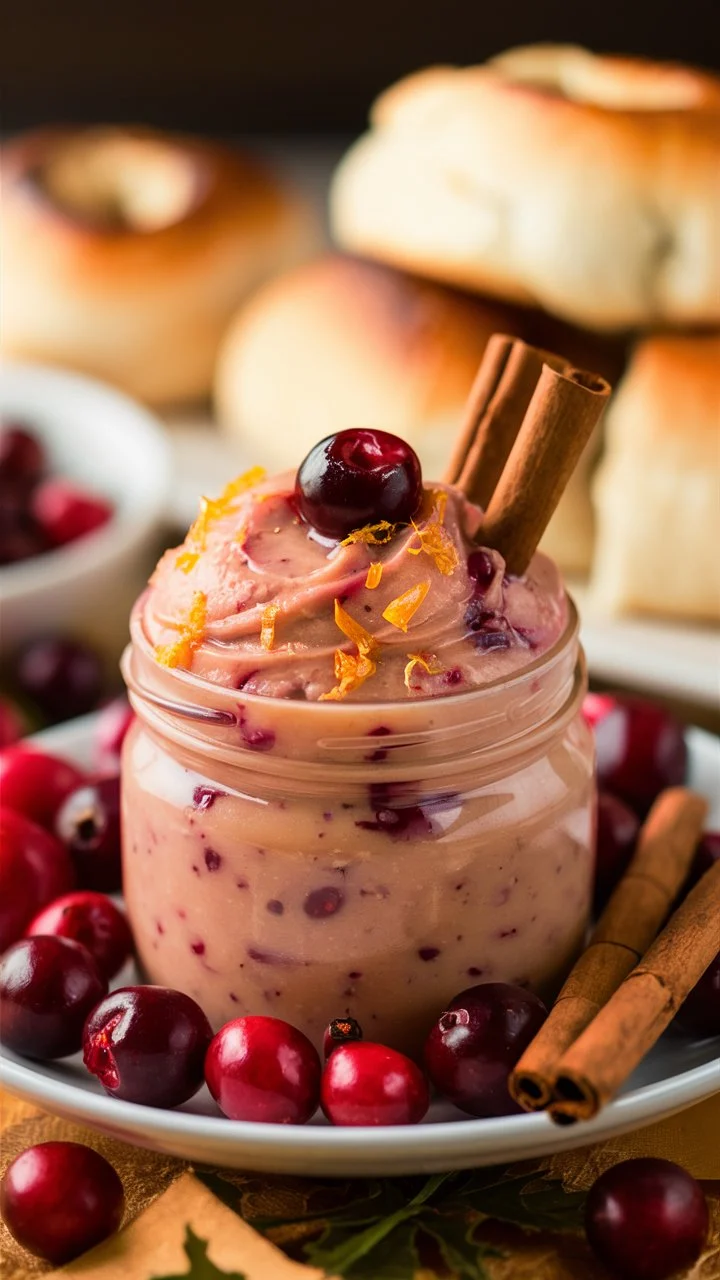
Have you ever tried a butter so good that you wanted to put it on everything? This Cranberry Holiday Butter is that butter!
It’s creamy, sweet, and a little tangy, filled with bright red cranberries that look beautiful on your table. Spread it on warm bread, swirl it into oatmeal, or use it as a glaze on chicken or turkey. Every bite feels like a warm holiday hug, making your breakfast or dinner extra special.
This recipe is quick, easy, and perfect for the holidays. It also makes a beautiful homemade gift for your family and friends.
Why You Will Love This Cranberry Holiday Butter
✅ Festive and Beautiful – The ruby-red cranberries look stunning on your table. ✅ Easy to Make – Ready in just 15 minutes with simple ingredients. ✅ Versatile – Delicious on bread, waffles, meats, or cheese boards. ✅ Perfect for Gifting – Pack in small jars with a ribbon for a heartfelt holiday gift.
Ingredients You Need
1 cup fresh cranberries (washed and patted dry)
1 cup unsalted butter, softened to room temperature
¼ – ⅓ cup powdered sugar (adjust to taste)
1 teaspoon vanilla extract
✨ Optional: A pinch of cinnamon or nutmeg for extra warmth.
How to Make Cranberry Holiday Butter
Step 1: Prepare Cranberries
Rinse your fresh cranberries and remove any soft or spoiled ones. Pat them dry completely.
Step 2: Mix Butter and Cranberries
In a bowl, add softened butter and cranberries. Using a hand mixer or food processor, blend until the cranberries are broken into small bits and well combined with the butter.
Step 3: Sweeten It
Add powdered sugar gradually, tasting as you go, until you get your desired level of sweetness.
Step 4: Add Vanilla
Mix in the vanilla extract and optional cinnamon or nutmeg if using.
Step 5: Chill
Spoon the butter into a jar or small bowl. Cover and refrigerate for at least 1 hour to let the flavors blend.
Step 6: Serve and Enjoy
Serve on warm bread, pancakes, scones, or use as a glaze on meats.
Tips for Success
✔ Use fresh cranberries for the best flavor. ✔ Taste as you go to adjust sweetness. ✔ Add cinnamon or orange zest for a flavor twist. ✔ Let the butter sit at room temperature for 10 minutes before serving for easy spreading.
Mistakes to Avoid
🚫 Using dried cranberries: They will make the butter overly sweet and chewy. Always use fresh for the perfect tart-sweet balance.
🚫 Skipping the chilling step: Chilling helps the flavors combine and improves texture.
🚫 Over-sweetening: Add sugar gradually and taste to keep a bright cranberry flavor.
Serving Suggestions
✨ Spread on warm bread, muffins, or cornbread. ✨ Dollop on pancakes or waffles for a festive breakfast. ✨ Add to a cheese platter to pair with brie or sharp cheddar. ✨ Melt over roasted sweet potatoes or carrots. ✨ Swirl into oatmeal for a cozy morning bowl.
Storage Tips
✅ Store in an airtight jar in the fridge for up to 10 days. ✅ You can freeze it for up to 3 months; thaw overnight in the fridge before using.
FAQs
Can I use frozen cranberries? Yes, thaw them first and pat dry before using.
Can I make it vegan? Yes, use vegan butter instead of dairy butter.
Can I add other flavors? Yes, try orange zest, a splash of maple syrup, or spices like nutmeg for variety.
Is it good for gifts? Absolutely! Fill small jars, tie with a ribbon, and gift during the holidays.
Final Thoughts
This Cranberry Holiday Butter is a must-try for your holiday season. It’s beautiful, easy, and makes every meal feel festive and warm. Whether you spread it on fresh bread, melt it over veggies, or give it as a gift, this recipe will become a family favorite you make every year.
If you try this recipe, leave a comment below and let me know how you served it!
✨ Follow my site for more easy, beautiful recipes that make your kitchen a place of joy!
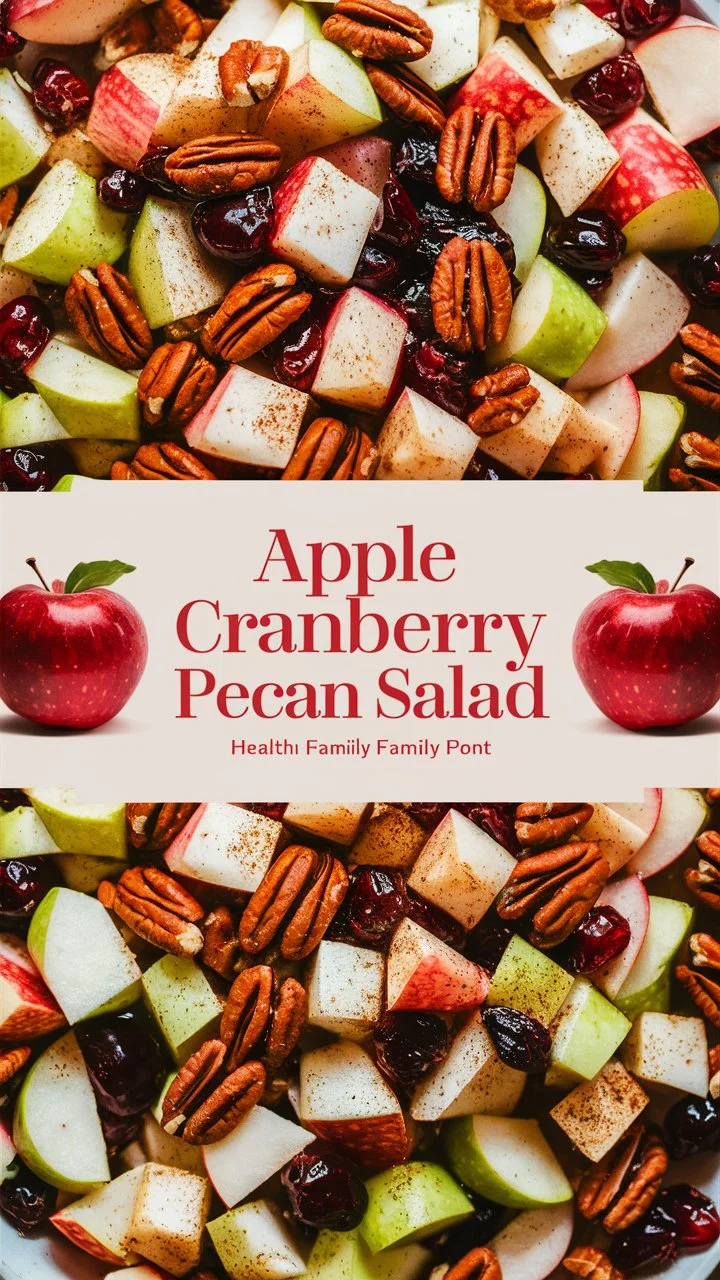
Ever feel tired of boring salads? This Apple Cranberry Pecan Salad is like a fresh breeze on your table. 🍃 Imagine crunchy apples, tangy cranberries, and toasty pecans dancing together with sweet and tart flavors in every bite.
I first made this for my sister’s birthday lunch, and it was gone in minutes. It’s colorful, quick, and feels like a little celebration in a bowl. Perfect for busy days, holiday gatherings, or when you just need something healthy but delicious!
❤️ Why You’ll Love This Salad
✅ Ready in 10 minutes – Great for busy moms and quick lunches. ✅ Healthy & Fresh – Fiber, antioxidants, and natural sweetness. ✅ Perfect for any occasion – Parties, lunchboxes, or holiday dinners. ✅ Customizable – Add feta, chicken, or quinoa for a filling meal. ✅ No fancy ingredients – Everything is easy to find and budget-friendly.
🥗 Ingredients You’ll Need
2 crisp apples (Honeycrisp or Granny Smith), diced
½ cup dried cranberries (unsweetened or sweetened)
½ cup pecans, roughly chopped (toast them for extra flavor)
4 cups mixed greens (baby spinach, arugula, or spring mix)
¼ cup pomegranate seeds (optional for color & sweetness)
2 tbsp lemon juice (to keep apples from browning)
Your favorite dressing (balsamic vinaigrette or a honey mustard works great)
👩🍳 How to Make Apple Cranberry Pecan Salad
1️⃣ Dice & Prep Apples
Dice apples into bite-sized pieces and toss with lemon juice to keep them fresh and crisp.
2️⃣ Mix the Base
In a large bowl, add mixed greens as your fresh, nutrient-packed base.
3️⃣ Add Toppings
Sprinkle apples, cranberries, pecans, and pomegranate seeds over the greens.
4️⃣ Dress It Up
Drizzle your dressing right before serving and toss gently.
5️⃣ Serve & Enjoy
Plate immediately for the best crunch and freshness.
💡 Pro Tips for the Best Salad
✨ Toast the pecans for a richer nutty taste. ✨ Add cheese like feta or goat cheese for creaminess. ✨ Add protein like grilled chicken or chickpeas to make it a full meal. ✨ Dress just before serving to keep greens crisp. ✨ Taste and adjust – if it needs more tang, add a splash of lemon or vinegar.
❌ Mistakes to Avoid
🚫 Using old apples – fresh, crisp apples make the salad shine. 🚫 Skipping lemon juice – your apples will brown quickly without it. 🚫 Overdressing – soggy salads are sad; start with less and add as needed. 🚫 Using stale pecans – always check for freshness.
🍴 What to Serve With This Salad
✨ Grilled Chicken or Salmon for a protein-packed dinner. ✨ Soup & Salad Combo for a cozy lunch. ✨ Holiday Sides alongside turkey or roast beef. ✨ Quinoa or Couscous to create a hearty salad bowl.
🙋♀️ FAQs
Can I prep this salad ahead of time? Yes! Prep ingredients and store separately. Toss together with dressing just before serving.
Can I use fresh cranberries? Fresh cranberries are too tart; stick with dried, or soak them in orange juice to soften if needed.
Is this salad vegan? Yes, it is naturally vegan and can fit most healthy diets.
How do I store leftovers? Store undressed salad in an airtight container in the fridge for up to 2 days.
🌟 Final Thoughts
This Apple Cranberry Pecan Salad is your new favorite easy, healthy, and beautiful recipe. It’s fresh, colorful, and makes you feel good with every bite. Perfect for when you want to add a bit of joy and color to your meals.
If you loved this recipe, follow me for more easy, fresh recipes that make your days brighter and your meals happier!
✨ Pin this recipe for later, and don’t forget to share it with a friend who needs salad inspiration!
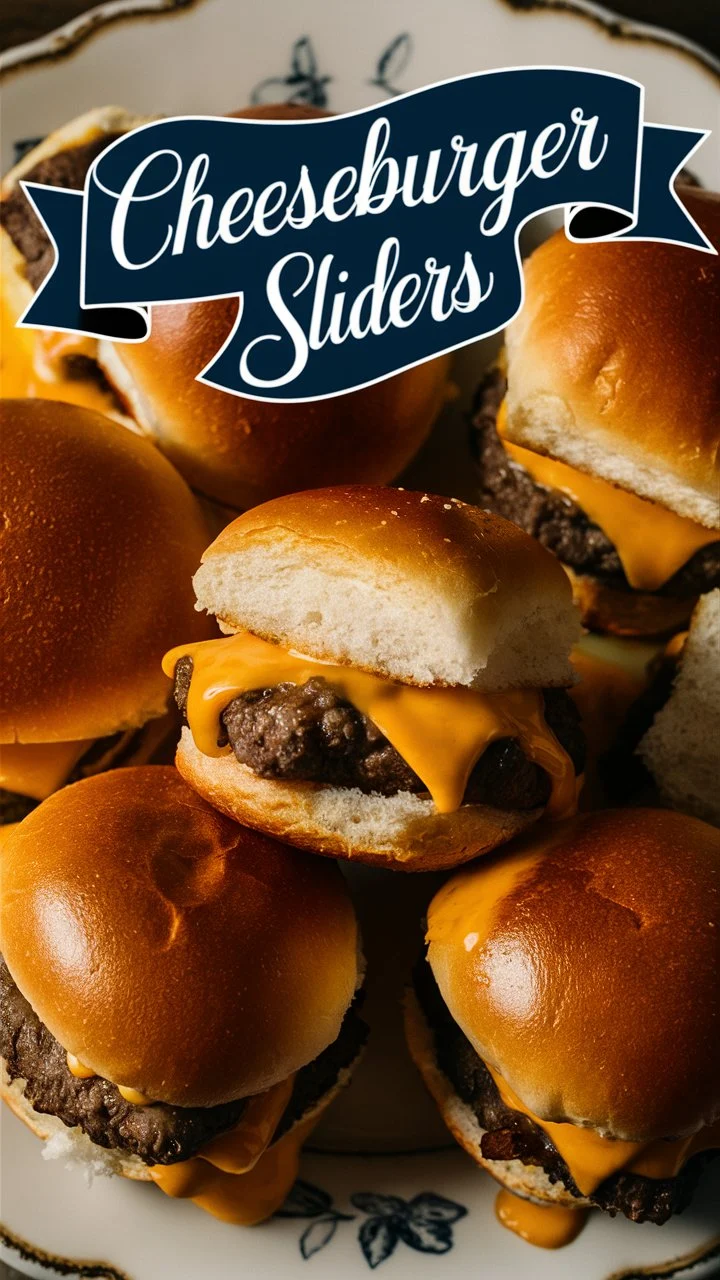
Cheeseburger sliders are the perfect little burgers that pack big flavor! These mini sandwiches are juicy, cheesy, and full of delicious toppings. They’re quick to make and even quicker to disappear at any party, family meal, or movie night.
This recipe will show you how to make the best cheeseburger sliders that everyone, from kids to adults, will love. Let’s get cooking!
Why You’ll Love These Cheeseburger Sliders
Quick & Easy: Simple ingredients and ready in under 30 minutes.
Perfect for Any Occasion: Serve them at birthday parties, game nights, or casual dinners.
Customizable: Pick your favorite toppings, sauces, and cheeses.
Kid-Friendly: Their small size makes them fun and easy to eat!
Ingredients You Need
1 pound ground beef (80/20 for juicy sliders)
Slider buns (12-pack, soft and fresh)
6 slices of American or cheddar cheese (cut in halves)
In a bowl, mix ground beef, salt, pepper, garlic powder, and onion powder.
Divide into 12 equal balls and flatten into small patties.
Cook the Patties
Grill or fry for 3-4 minutes on each side until cooked through.
Add cheese slices on top during the last minute of cooking.
Toast the Buns (Optional)
Lightly toast the buns in the oven or on a pan for extra flavor and crispiness.
Assemble the Sliders
Place the cheesy patty on the bottom bun.
Add toppings: lettuce, tomato, pickles, sauces.
Cover with the top bun and press gently.
Serve and Enjoy!
Serve warm with fries, chips, or a side salad.
Tips for Perfect Sliders
Use fresh, soft buns that hold up well.
Don’t overcook the patties—you want them juicy!
Let the patties rest for 2 minutes before assembling.
Make a slider topping bar so everyone can build their own!
Slider Variations to Try
BBQ Sliders: Mix BBQ sauce into the beef and top with onion rings.
Bacon Sliders: Add crispy bacon strips for an extra treat.
Spicy Jalapeño Sliders: Add jalapeños and pepper jack cheese.
Veggie Sliders: Use black bean or lentil patties for a vegetarian version.
What to Serve With Cheeseburger Sliders
French Fries: Classic and crunchy.
Coleslaw: Adds freshness and crunch.
Pasta Salad: Great for potlucks.
Pickles and Chips: Quick and tasty side.
Common Mistakes to Avoid
Dry Meat: Use beef with some fat (80/20) for juicy sliders.
Skipping Seasoning: Always season your beef for more flavor.
Overcooking: Keep them tender and moist by not overcooking.
Cheap Buns: Use good-quality buns that won’t fall apart.
FAQs
Can I make these ahead of time? Yes! You can shape the patties in advance and store them in the fridge.
Can I freeze sliders? Cooked patties can be frozen. Reheat in the oven before serving.
What cheese melts best? American cheese melts perfectly, but cheddar or Swiss are great options too.
Final Thoughts
These cheeseburger sliders are everything you need in a mini burger: juicy beef, melty cheese, soft buns, and toppings that pop with flavor. Whether you’re making them for a crowd or a cozy dinner, they’re guaranteed to impress.
So next time you need a fun, easy, and satisfying recipe—this is it. Bookmark this post, follow us for more amazing recipes, and get ready to become everyone’s favorite cook!
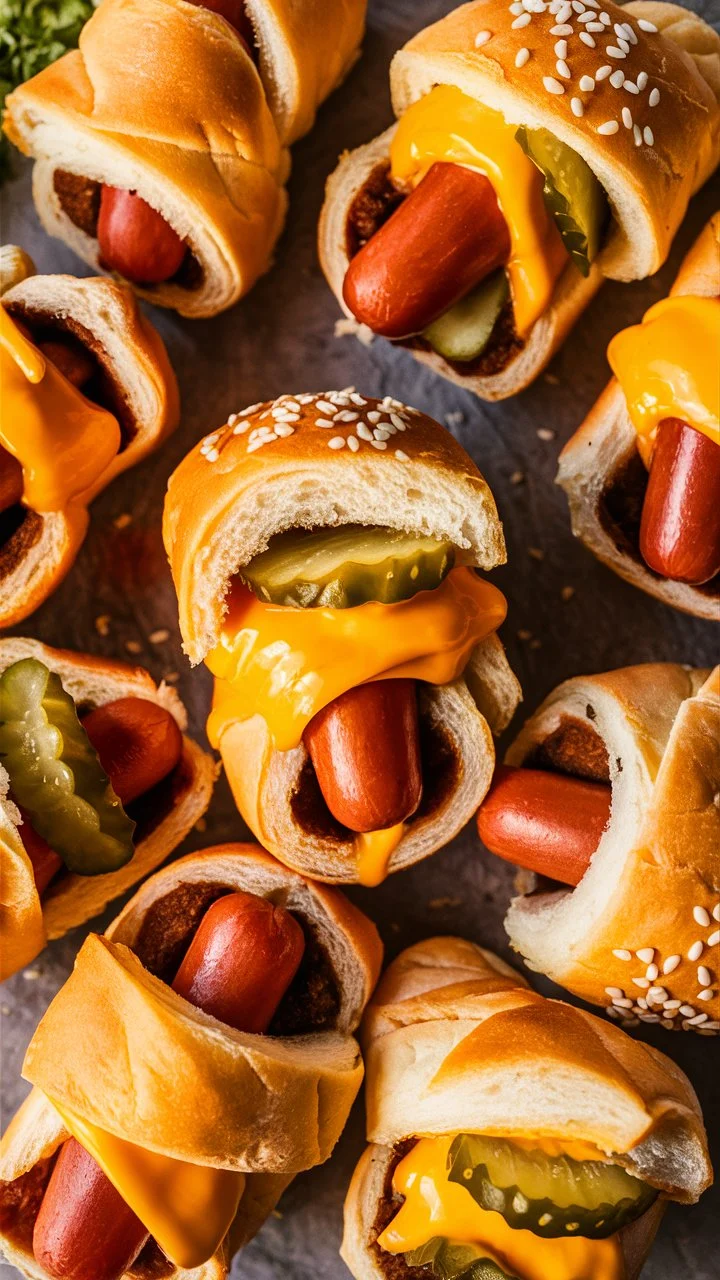
Have you ever wanted to make a snack that’s quick, delicious, and makes everyone smile? This easy pigs in a blanket recipe is just what you need! These little bites are golden, flaky on the outside, and juicy inside. They’re perfect for parties, family nights, game days—or even just because!
Why You’ll Love This Recipe
Super Quick to Make: From start to finish, you’ll have these ready in just 30 minutes.
Only a Few Ingredients: No fancy items here—just puff pastry, mini sausages, and a little egg.
Always a Hit: Kids love them. Adults love them. Everyone asks for more!
Fun to Customize: You can add cheese, different sausages, or even spices to make your own version.
Ingredients
Here’s what you need:
1 pack of puff pastry sheets (store-bought is fine)
1 pack of mini sausages or cocktail franks
1 egg (for egg wash)
Optional: cheese slices, garlic powder, sesame seeds, or herbs
How to Make Pigs in a Blanket
Step 1: Preheat the Oven Heat your oven to 400°F (200°C). Line a baking tray with parchment paper.
Step 2: Prepare the Pastry Roll out the puff pastry. Cut it into small rectangles, big enough to wrap around the sausages.
Step 3: Wrap the Sausages Place a sausage on one end of the pastry and roll it up. If using cheese, place a small piece with the sausage before rolling.
Step 4: Brush with Egg Wash In a small bowl, beat one egg with a splash of water. Brush this over each rolled-up piece. This helps make them shiny and golden when baked.
Step 5: Bake Place them on your baking sheet, leaving space between each. Bake for 15–20 minutes or until they’re puffed up and golden brown.
Step 6: Serve Let them cool for a few minutes, then serve with your favorite dipping sauces—like mustard, ketchup, or even spicy mayo!
Tips and Tricks for Perfect Pigs in a Blanket
Use Cold Dough: Keep the pastry cold until you’re ready to use it. This helps it puff up better.
Don’t Overcrowd: Leave space between each roll on the baking tray so they cook evenly.
Serve Right Away: They taste best when fresh and warm.
Reheat in the Oven: Leftovers? Heat them in the oven, not the microwave, to keep them crispy.
Common Mistakes to Avoid
Wrong Dough: Avoid using thick biscuit dough—it gets heavy. Puff pastry or crescent dough works best.
Skipping Preheat: Always preheat the oven so the pastries bake evenly.
Too Close Together: Give them space on the tray or they’ll bake unevenly and get soggy.
Serving Ideas
Make your pigs in a blanket part of a fun snack spread! Here’s how:
Dipping Sauces: Serve with ketchup, mustard, BBQ sauce, ranch, or cheese sauce.
Veggie Platter: Add crunchy carrots, cucumbers, and cherry tomatoes for freshness.
Cheese Board: A few types of cheese go great with these bites.
Fruit Salad: Fresh fruit balances the salty flavor perfectly.
FAQs
Can I make them ahead of time? Yes! Assemble and store them in the fridge (unbaked) for up to 1 day. Bake when ready.
Can I use different sausages? Absolutely! Try beef, chicken, spicy, or even veggie sausages.
Can I freeze them? Yes, freeze after baking. Reheat in the oven at 350°F (175°C) until warm and crispy.
What sauces go best? Mustard, ketchup, ranch, spicy mayo, or even honey mustard are all great choices.
Final Thoughts
This pigs in a blanket recipe is one you’ll want to make again and again. It’s easy, tasty, and always a crowd favorite. Plus, you can get creative with flavors, sauces, and sides. Whether you’re new to cooking or a kitchen pro, this is one recipe that never fails.
✨ Try it today—and don’t forget to follow us for more fun, simple, and delicious recipes like this one!
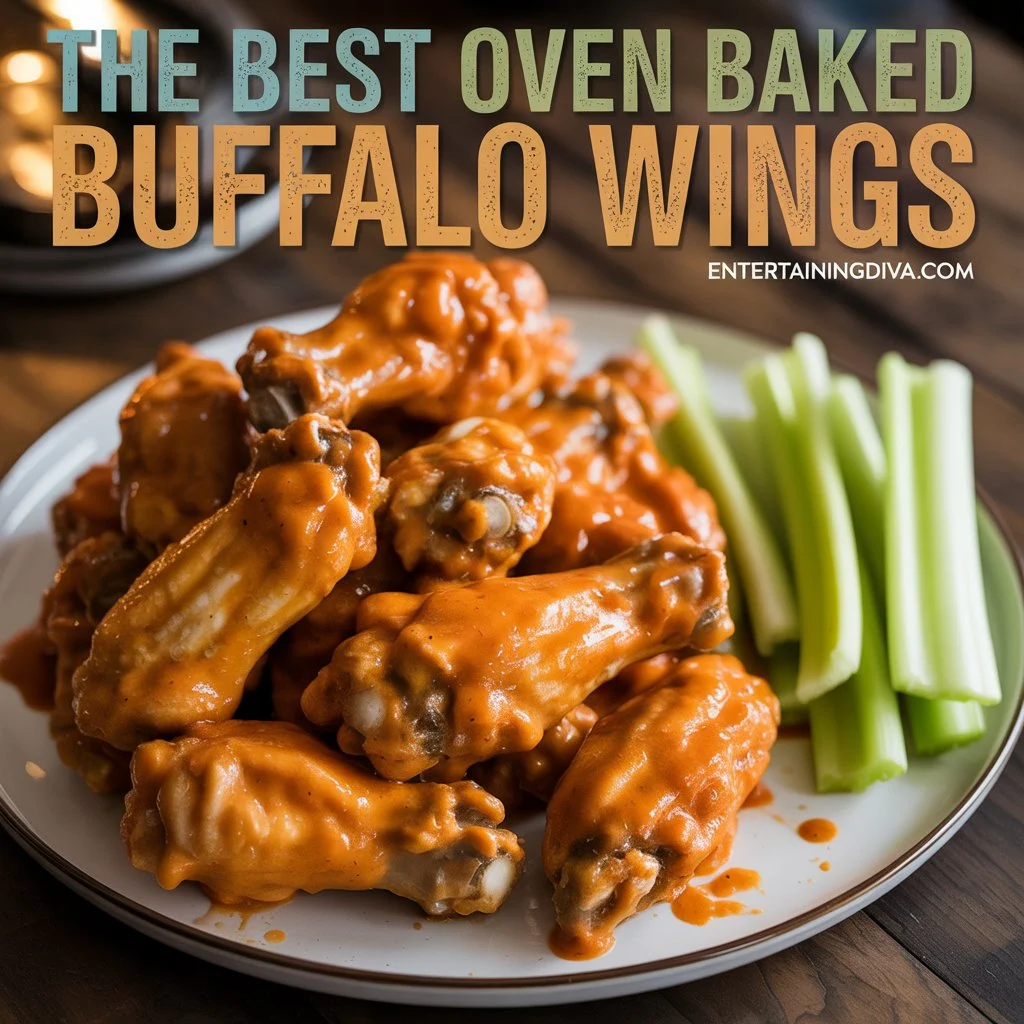
Looking for the perfect game-day snack or a crowd-pleasing appetizer? These Baked Buffalo Wings are crispy, juicy, spicy, and packed with flavor — all without deep frying! Whether you’re hosting a party or just craving something bold, this recipe is simple to make and totally addictive.
Once you try these wings, you’ll never go back to store-bought again!
❤️ Why You’ll Love These Baked Buffalo Wings
✅ Healthier Than Fried – All the flavor, less oil!
✅ Crispy Outside, Juicy Inside – Thanks to oven-baking at high heat.
✅ Quick and Easy – Simple steps and ready in under 1 hour.
✅ Customizable Heat – Make them mild, medium, or fiery.
✅ Perfect for Any Occasion – Game night, BBQs, or family dinners.
🛒 Ingredients You’ll Need
Here’s what you’ll need to get started:
2 pounds chicken wings (fresh or thawed)
1 tablespoon olive oil
1 teaspoon garlic powder
Salt and black pepper to taste
🔥 For the Buffalo Sauce:
½ cup Frank’s RedHot Sauce (or any hot sauce you like)
¼ cup unsalted butter (melted)
1 teaspoon honey (optional – for a sweet touch)
👉 Want it spicier? Add a pinch of cayenne pepper or chili flakes!
🍽️ Step-by-Step Instructions
Step 1: Preheat Your Oven
Preheat to 425°F (220°C).
Line a baking sheet with foil and place a wire rack on top. This helps the wings cook evenly and get crispy!
Step 2: Prepare the Wings
Pat dry the wings with paper towels (this is key for crispiness!).
In a large bowl, toss wings with olive oil, garlic powder, salt, and pepper.
Step 3: Bake the Wings
Spread wings in a single layer on the rack.
Bake for 30–35 minutes, turning halfway, until golden brown and crispy.
Step 4: Make the Buffalo Sauce
While wings bake, melt butter in a saucepan over low heat.
Stir in hot sauce (and honey, if using) until smooth.
Step 5: Toss in Sauce
Once wings are done, remove from oven and place in a clean bowl.
Pour the sauce over the wings and toss gently to coat.
Optional: Pop back in the oven for 5 more minutes for extra crisp!
💡 Pro Tips for Perfect Wings
Use a wire rack: Air circulates better, making wings crispier.
Don’t overcrowd the pan: Give the wings space so they bake, not steam.
Pat them dry: Moisture = soggy skin. Always dry them before seasoning.
Customize your sauce: Add BBQ, lemon-pepper, or honey mustard if you want to switch it up!
❌ Mistakes to Avoid
Skipping the drying step: Wet wings won’t get crispy.
Overcrowding the tray: Leads to soggy, unevenly cooked wings.
Not seasoning enough: Always season before AND after baking for big flavor.
Skipping the marinade (if you have time): Even 30 minutes in the fridge with sauce makes wings more flavorful.
🥡 Storing & Reheating
Fridge: Store leftovers in an airtight container for up to 3 days.
Freezer: Freeze in a ziplock bag for up to 2 months.
To Reheat: Bake at 375°F for 10–15 mins or air-fry for 5–7 mins until hot and crispy.
🍽️ What to Serve With Buffalo Wings
🥕 Celery and carrot sticks
🥣 Blue cheese or ranch dip
🍟 Crispy fries or onion rings
🥗 Side salad for balance
🍺 Ice-cold beer or sparkling lemonade
❓ Frequently Asked Questions
Can I use frozen wings? Yes, just make sure to thaw and pat them dry before baking.
Can I make them in the air fryer? Absolutely! Air fry at 400°F for 20–25 minutes, flipping halfway.
Are these wings spicy? They can be! You control the heat by adjusting the amount of hot sauce.
Can I make them ahead of time? Yes! You can bake the wings in advance and toss in sauce just before serving.
💬 Final Thoughts
These Baked Buffalo Wings are everything you love — spicy, crispy, and totally satisfying. Whether it’s game night, a weekend hangout, or just a craving, this recipe will never let you down. Bonus? You didn’t even have to fry them!
🥰 Love what you made? Tag me, share your creation, and don’t forget to follow for more easy, tasty recipes every week!
✨ A Boozy, Beautiful Treat You’ll Fall in Love With
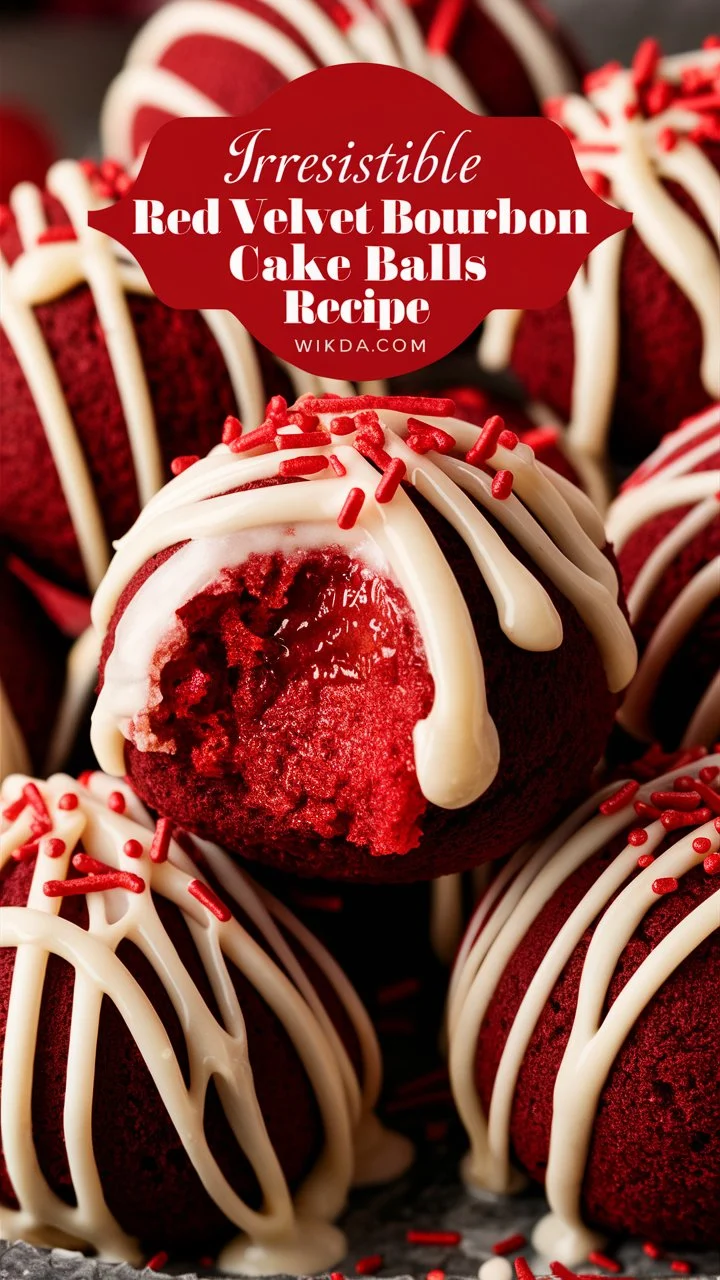
Have you ever wanted to make a dessert that’s easy, elegant, and unforgettable? These Red Velvet Bourbon Cake Balls are sweet, rich, and full of flavor — with a little boozy twist!
Perfect for parties, holidays, or even a quiet treat for yourself. They’re soft, creamy inside, and coated in smooth white chocolate… one bite and you’ll be hooked.
🧁 Why You’ll Love This Recipe
Rich, Flavorful, and Fun: Red velvet + bourbon + cream cheese + white chocolate = heaven!
Easy for Beginners: No fancy tools or experience needed. Just mix, roll, and dip.
Make-Ahead Friendly: Store in the fridge or freezer for later — perfect for busy days.
Great for Parties: They look beautiful, taste amazing, and everyone will ask for the recipe.
📝 Ingredients You’ll Need
1 box red velvet cake mix (or homemade if you prefer)
3 large eggs (check your cake mix instructions)
½ cup vegetable oil
½ cup bourbon (use your favorite!)
¾ cup cream cheese frosting (store-bought or homemade)
1½ cups white chocolate chips (for coating)
👉 Optional toppings: crushed nuts, sprinkles, or edible glitter
👩🍳 How to Make Red Velvet Bourbon Cake Balls
1: Bake the Cake
Preheat oven to 350°F (175°C).
Mix cake mix, eggs, and oil as per the package directions.
Pour into a greased baking pan and bake for 25–30 minutes.
Let the cake cool completely.
2: Crumble and Mix
Crumble the cooled cake into fine crumbs using your hands or a fork.
Add the cream cheese frosting and bourbon.
Mix well until everything sticks together like dough.
3: Form the Balls
Scoop 1 tablespoon of mixture and roll into smooth balls.
Place them on a tray lined with parchment paper.
Chill in the fridge for at least 30 minutes (very important!).
4: Coat with Chocolate
Melt white chocolate chips slowly in the microwave or over a double boiler.
Dip each cake ball into the melted chocolate using a fork.
Let excess chocolate drip off, then place back on the tray.
Add toppings if you want — crushed nuts, sprinkles, or a drizzle of dark chocolate.
Let them set completely.
🎉 Serving Ideas
Pair your Red Velvet Bourbon Cake Balls with:
A hot cup of coffee or espresso ☕
A scoop of vanilla ice cream 🍨
A glass of red wine 🍷
Fresh berries for a fruity touch 🍓
They also make beautiful gifts in small treat boxes!
🧊 Storing Tips
Fridge: Store in an airtight container for up to 2 weeks.
Freezer: Freeze for up to 2 months. Thaw in the fridge before serving.
💡 Expert Tips for Best Results
Use Room-Temperature Ingredients: Helps everything mix evenly.
Chill Before Dipping: Keeps the balls from falling apart in the chocolate.
Don’t Overdo the Bourbon: ½ cup is just right — strong but not overpowering.
Make Balls Even in Size: Use a cookie scoop for perfect portions.
Use Good Quality Chocolate: It makes a big difference in taste and look!
❌ Common Mistakes to Avoid
🚫 Skipping the chilling step 🚫 Overmixing the batter 🚫 Using cheap chocolate 🚫 Using cold ingredients 🚫 Not measuring properly 🚫 Forgetting to decorate (presentation matters!) 🚫 Leaving them out too long — they dry out
❓ FAQs
Q: Can I make these without bourbon? Yes! You can skip it or use vanilla extract or a splash of coffee instead.
Q: Can kids eat these? If you use bourbon, no. But you can make a non-alcoholic version easily.
Q: Can I use dark chocolate instead of white? Absolutely! Use whatever chocolate you love best.
Q: Can I make them a day ahead? Yes! In fact, they taste even better the next day.
💬 Final Thoughts
These Red Velvet Bourbon Cake Balls are more than just a treat — they’re a showstopper.
They look stunning, taste incredible, and are surprisingly easy to make.
Whether you’re baking for a party, gifting them to someone special, or just indulging in something sweet for yourself — this recipe is one to keep forever.
✨ Try them once and you’ll want to make them again and again. 📌 Don’t forget to save this recipe and follow me for more delicious ideas!
Have you been noticing the number 999 popping up everywhere—on clocks, receipts, or even license plates? If the 999 angel number keeps appearing in your life, it’s not a coincidence.
In numerology, repeating numbers like 999 are considered divine messages from the universe or your guardian angels.
These sequences carry spiritual guidance, nudging you toward alignment with your higher purpose.
Seeing the 999 angel number signals a powerful moment of transformation, closure, and new beginnings.
In this post, we’ll explore the spiritual significance of the 999 angel number, its meanings in love, career, and twin flame connections, and how you can embrace its energy.
Let’s dive into the uplifting messages behind this sacred number.
Spiritual Meaning of the 999 Angel Number
In numerology, the number 9 is associated with completion, wisdom, and spiritual enlightenment. When it appears as the 999 angel number, its energy is amplified, signaling a profound spiritual shift.
This number often appears when you’re nearing the end of a significant cycle in your life. It’s a call to release what no longer serves you—whether it’s old habits, limiting beliefs, or toxic relationships—and step into a higher vibration.
The 999 angel number is a reminder that you are a lightworker, destined to serve others with compassion and love. It encourages you to trust your intuition and embrace your soul’s purpose.
The universe is urging you to let go of fear and align with your divine mission. If you’re seeing 999, it’s a sign that you’re ready to evolve spiritually, embracing forgiveness, gratitude, and universal love.
This number also resonates with humanitarianism. It may be a nudge to contribute to the world through acts of kindness, charity, or creative expression.
The 999 angel number is a beacon of hope, reminding you that endings are often gateways to new beginnings. Trust that the universe is guiding you toward a path of fulfillment and inner peace.
999 Angel Number Meaning in Love and Relationships
When it comes to love, the 999 angel number carries a message of transformation and healing. If you’re in a relationship, seeing 999 may indicate that it’s time to release patterns or dynamics that no longer align with your growth.
This could mean having honest conversations, setting boundaries, or, in some cases, lovingly letting go of a relationship that has run its course. The 999 angel number encourages you to prioritize authenticity and emotional freedom in your partnerships.
For those who are single, 999 is a sign to focus on self-love and personal growth. The universe is preparing you for a new chapter in love, but first, you must release past hurts or emotional baggage.
This number reminds you that you are whole and complete on your own, and by embracing your inner strength, you’ll attract a relationship that aligns with your higher self.
The 999 angel number also emphasizes forgiveness in love.
Whether it’s forgiving yourself for past mistakes or letting go of resentment toward others, this number encourages you to approach relationships with compassion and openness.
By releasing negativity, you create space for deeper, more meaningful connections.
999 Angel Number Meaning in Career and Decision-Making
In the context of career and decision-making, the 999 angel number is a powerful indicator of change and alignment.
If you’ve been feeling unfulfilled in your job or uncertain about a major decision, 999 signals that it’s time to close one chapter and embrace new opportunities.
This number encourages you to trust your instincts and pursue a career path that aligns with your soul’s purpose.
The 999 angel number often appears when you’re being called to step into a leadership role or pursue a passion that serves others.
If you’ve been contemplating a career change, starting a business, or taking a bold step, 999 is a sign that the universe supports your decision.
However, it also reminds you to let go of fear or self-doubt that may be holding you back.
This number also highlights the importance of integrity in your professional life. Are you living in alignment with your values?
The 999 angel number encourages you to make decisions that reflect your authenticity and contribute to the greater good.
Trust that as you release what no longer serves you, new doors will open, leading to abundance and fulfillment.
999 Angel Number and Twin Flame Connections
For those on a twin flame journey, the 999 angel number holds special significance. Twin flames are two souls who share a deep, spiritual connection, often described as two halves of the same soul.
Seeing 999 in the context of your twin flame journey suggests that you’re nearing the end of a significant phase in this connection.
If you’re in separation from your twin flame, the 999 angel number is a reminder to focus on your personal growth and healing.
This number encourages you to release attachment to the outcome of the relationship and trust the divine timing of the universe.
The end of a separation phase may be near, but it requires both partners to align with their higher selves.
For those in union or moving toward reunion, 999 signifies that your connection is evolving to a higher spiritual level.
This number encourages you and your twin flame to work together to fulfill a shared purpose, often one that benefits others.
The 999 angel number is a call to embrace unconditional love, forgiveness, and mutual growth in your twin flame journey.
5 FAQs About the 999 Angel Number
What does it mean if I keep seeing the 999 angel number? Seeing the 999 angel number repeatedly is a sign from the universe that you’re approaching the end of a cycle. It’s a call to release what no longer serves you and embrace new beginnings aligned with your spiritual purpose.
Is the 999 angel number a warning? The 999 angel number is not a warning but a gentle nudge from your angels. It encourages you to let go of old patterns, trust the process of change, and align with your higher self.
How does the 999 angel number affect my love life? In love, 999 signifies transformation and healing. It may prompt you to release toxic dynamics, focus on self-love, or forgive past hurts to create space for healthier relationships.
Can the 999 angel number guide my career choices? Yes, 999 encourages you to pursue a career that aligns with your soul’s purpose. It’s a sign to let go of unfulfilling jobs or decisions and trust that new opportunities are on the horizon.
How should I respond to seeing the 999 angel number? Reflect on areas of your life where you feel stuck or unaligned. Meditate, journal, or pray to connect with your intuition. Take inspired action to release old patterns and embrace new possibilities.
Conclusion
The 999 angel number is a powerful spiritual message, guiding you toward completion, transformation, and alignment with your divine purpose.
Whether it’s in love, career, or your twin flame journey, this number encourages you to release what no longer serves you and step boldly into a new chapter.
By trusting the universe and embracing change, you open the door to growth, fulfillment, and spiritual enlightenment.
Affirmations to Align with the 999 Angel Number
I release what no longer serves me with love and gratitude.
I trust the universe to guide me toward my highest purpose.
I am open to new beginnings and divine opportunities.
I embrace my role as a lightworker with compassion and courage.
I am whole, complete, and aligned with my soul’s mission.
Next Steps
Reflect and Release: Journal about areas of your life where you feel stuck. What can you let go of to move forward?
Meditate on 999: Spend a few minutes daily visualizing the number 999 and asking your angels for guidance.
Take Inspired Action: Whether it’s making a career move, having a heart-to-heart in your relationships, or pursuing a passion, act on the nudges you feel.
Practice Gratitude: Thank the universe for the endings and new beginnings in your life, trusting that everything is unfolding for your highest good.
Have you been noticing the number 666 popping up everywhere—on clocks, receipts, or even license plates? If the 666 angel number keeps catching your eye, it’s no coincidence.
In numerology, repeating numbers like 666 are believed to carry spiritual messages from the universe, guiding you toward alignment and growth.
Far from its misunderstood reputation, the 666 angel number is a powerful sign of balance, self-awareness, and transformation.
This post dives into the spiritual significance of the 666 angel number, exploring its meanings in love, career, twin flame connections, and more.
Let’s uncover why the universe is nudging you with this intriguing number.
Spiritual Meaning of the 666 Angel Number
The 666 angel number often gets a bad rap due to cultural associations, but in spiritual numerology, it’s a call to realign your thoughts and energies. The number 6 resonates with harmony, nurturing, and responsibility.
When tripled, as in 666, its influence amplifies, urging you to focus on balance in your spiritual, emotional, and physical life.
Seeing the 666 angel number suggests you may be out of sync with your higher purpose. Perhaps you’re overly focused on material concerns—like money or status—at the expense of your inner peace.
The universe is gently reminding you to shift your perspective, trust your intuition, and align with love and compassion.
This number encourages you to release fear-based thoughts and embrace a mindset of abundance and positivity.
In essence, the 666 angel number is a wake-up call to reconnect with your spiritual core. Meditate, journal, or spend time in nature to ground yourself.
Ask: Are my thoughts serving my highest good? The answers will guide you toward balance and clarity.
666 Angel Number in Love and Relationships
When it comes to love, the 666 angel number emphasizes nurturing and mutual support. If you’re in a relationship, this number may signal a need to reassess balance.
Are you giving too much without receiving, or perhaps not investing enough emotionally? The 666 angel number encourages open communication and acts of kindness to strengthen your bond.
For singles, seeing 666 is a reminder to cultivate self-love before seeking a partner. The universe is nudging you to heal old wounds and embrace your worth.
By focusing on your own growth, you attract relationships that align with your authentic self. This number also suggests that love is near, but it starts with loving yourself fully.
In all romantic contexts, the 666 angel number asks you to release fears of rejection or abandonment. Trust that the universe is guiding you toward connections that feel supportive and harmonious.
Practice gratitude for the love already in your life, and watch it multiply.
666 Angel Number in Career and Decision-Making
In the realm of career and decisions, the 666 angel number signals a need for balance between work and personal life. Are you overworking or chasing goals that don’t truly fulfill you?
This number encourages you to reassess your priorities and align your career with your passions and values.
If you’re facing a big decision, 666 is a sign to trust your intuition over external pressures. The universe is urging you to let go of fear-based choices—like staying in a job for security alone—and pursue paths that resonate with your soul.
This might mean setting boundaries, seeking a new opportunity, or investing in skills that inspire you.
Financially, the 666 angel number reminds you that abundance flows when you focus on service and purpose rather than scarcity. Take practical steps, like budgeting or exploring new income streams, but do so with a mindset of trust and optimism.
The universe supports your efforts when you align with your higher calling.
666 Angel Number and Twin Flame Connections
The 666 angel number holds special significance for twin flame journeys. A twin flame is a soul connection that mirrors your energy, pushing you toward growth and self-discovery.
If you’re seeing 666, it may indicate that your twin flame relationship is entering a phase of healing or transformation.
If you’re already connected with your twin flame, 666 suggests focusing on balance within the relationship. Are both of you supporting each other’s growth, or is one carrying the emotional load?
This number encourages mutual respect and understanding to deepen your bond.
For those still seeking their twin flame, 666 is a sign to focus on inner work. Heal past traumas and embrace self-love to prepare for this intense connection.
The universe is aligning you with your twin flame, but patience and personal growth are key. Trust that divine timing is at play.
5 FAQs About the 666 Angel Number
1. Is the 666 angel number a bad omen?
No, the 666 angel number is not a bad omen. Despite its negative cultural associations, in numerology, it’s a positive sign of balance, healing, and spiritual alignment. It encourages you to release fear and focus on love and harmony.
2. Why do I keep seeing 666 everywhere?
Seeing the 666 angel number repeatedly is a message from the universe. It suggests you need to realign your thoughts, prioritize balance, and trust your intuition. Pay attention to what’s happening in your life when you see it for clues.
3. How does the 666 angel number affect my love life?
In love, 666 calls for nurturing and balance. For couples, it’s a reminder to communicate and support each other. For singles, it emphasizes self-love as the foundation for attracting healthy relationships.
4. What should I do when I see the 666 angel number?
Reflect on areas of your life needing balance—relationships, career, or personal growth. Meditate, journal, or set intentions to align with your higher purpose. Trust your intuition and take small, practical steps toward harmony.
5. Can the 666 angel number guide my career choices?
Yes, 666 encourages you to align your career with your passions and values. It’s a sign to trust your intuition, set boundaries, and pursue work that fulfills you rather than chasing material gain alone.
Conclusion
The 666 angel number is a powerful reminder that you’re supported by the universe in your journey toward balance and growth.
It’s not a warning but an invitation to realign your thoughts, nurture your relationships, and pursue a career that lights up your soul.
Whether you’re navigating love, a twin flame connection, or a big decision, 666 encourages you to trust your intuition and embrace love over fear.
Affirmations to Work With the 666 Angel Number
I am in perfect balance with my mind, body, and soul.
I release fear and embrace love in all areas of my life.
The universe guides me toward abundance and harmony.
I trust my intuition to lead me to my highest good.
I am worthy of love, success, and spiritual growth.
Next Steps
Reflect: Journal about where you feel out of balance. Are you neglecting self-care, relationships, or your passions?
Meditate: Spend 5–10 minutes daily connecting with your inner self. Visualize the 666 angel number surrounding you with calming energy.
Act: Take one small step toward alignment, like setting a work boundary, practicing self-love, or exploring a new career path.
Stay Open: Keep noticing 666 and other angel numbers. The universe is always communicating—trust its guidance.